by mj | Oct 19, 2020 | Business

Save the Children is a world leading independent organisation for children. They strive to give children an environment in which human rights and needs are protected.
They contacted us through Smarter Surfaces Corporate Social Responsibility programme, looking to bring create a whiteboard wall with our whiteboard paint in their offices. They applied our award-winning whiteboard paint, Smart Wall Paint to three of their offices and are thrilled with the results.
They summed up Smart Whiteboard Paint in three words:
Innovative – it uses the as-built environment without having to drill, screw or damage a wall surface.
Streamlined – it provides a clean finished look for the user.
Inducive – people naturally want to try it out, it supports innovation, collaboration and the exchange of ideas. People of all ages fulfil a need to write on walls.
He went on to tell us, “our contractor who applied the surface had experience with other whiteboard paints from a different manufacturer. He commented Smart Whiteboard Paint went on much easier and had less fumes”.
The resulting finish was very nice and uniform.
They would ‘recommend the products to other companies looking for unique solutions for their surfaces.’ He was greatly impressed by the contractor’s feedback that ‘it was a lot simpler and less toxic in application compared to other products they have used in the past’.
In the past, Save the Children Canada used traditional whiteboards but now they have Smart Whiteboard Paint in three of their offices, each with their own Smarter Surfaces area.
All of their staff use new surfaces as they are a company who have ‘frequent meetings and value heavy organisation’.
How do they make use of their new whiteboard walls? Mark answered that question for us too. “We can use our new surfaces for financial information, project information, collaboration ideas, staff education and seminars.”
To learn more about Save The Children Canada, visit their website here.

by sefali | Oct 19, 2020 | Blog
Have you ever felt constricted by the traditional, framed whiteboards, typically found on the walls of classrooms, offices, and conference rooms? If you’re looking to add a dash of modernity and boundless creativity to your space, it’s time you turned your wall into a whiteboard. In this how to turn a wall into a whiteboard guide, we’ll explore the reasons to make this transformation, dive deep into the how-to’s, and answer some of your most pressing questions about turning a wall into a whiteboard.
Why Turn Your Wall Into a Whiteboard?
1. An Array of Choices Tailored to Your Needs
One of the best aspects when thinking about how to turn a wall into a whiteboard is the wide range of products available for every requirement and aesthetic.
What Paint Allows You to Write on Walls?
Two whiteboard paint products you should consider when looking at how to turn a wall into a whiteboard are Matte Whiteboard Paint and Smart Whiteboard Paint. Matte Whiteboard Paint offers a unique, matte finish that also improves light reflectivity, making it ideal for environments where projectors or screens are often used. On the other hand, Smart Whiteboard Paint has garnered numerous awards for its commercial-grade quality and comes with a complete kit for DIYers.
2. Ease of Application
Many people are intimidated by just thinking of how to turn a wall into a whiteboard. However, you’ll be pleasantly surprised to discover if consider how to turn a wall into a whiteboard, that it’s a straightforward application process. Whether you’re a DIY enthusiast or professional installer, there’s a solution that matches your comfort level and skill set.
How do you make walls writable?
If you’re wondering how to apply dry erase paint on walls, it’s a straightforward process, especially with the step-by-step guides provided with our whiteboard paints and wallpapers. Matte Whiteboard Paint, for instance, can be applied like any standard paint and can be used within four days. Smart Whiteboard Paint’s all-inclusive kit ensures that even first-timers can transform a wall into a dry erase canvas. For larger projects, our Whiteboard Wallpaper is still very easy to apply.
3. No More Size Restrictions
Gone are the days when you had to curb your ideas to fit within the confines of a traditional whiteboard. Traditional whiteboards often come with a limiting factor their size. No matter how expansive your ideas or how large your team, you find yourself restricted by the physical dimensions of the board. With limited space, only one person can effectively write or draw at a given time, and larger brainstorming sessions become a jumbled, chaotic experience.
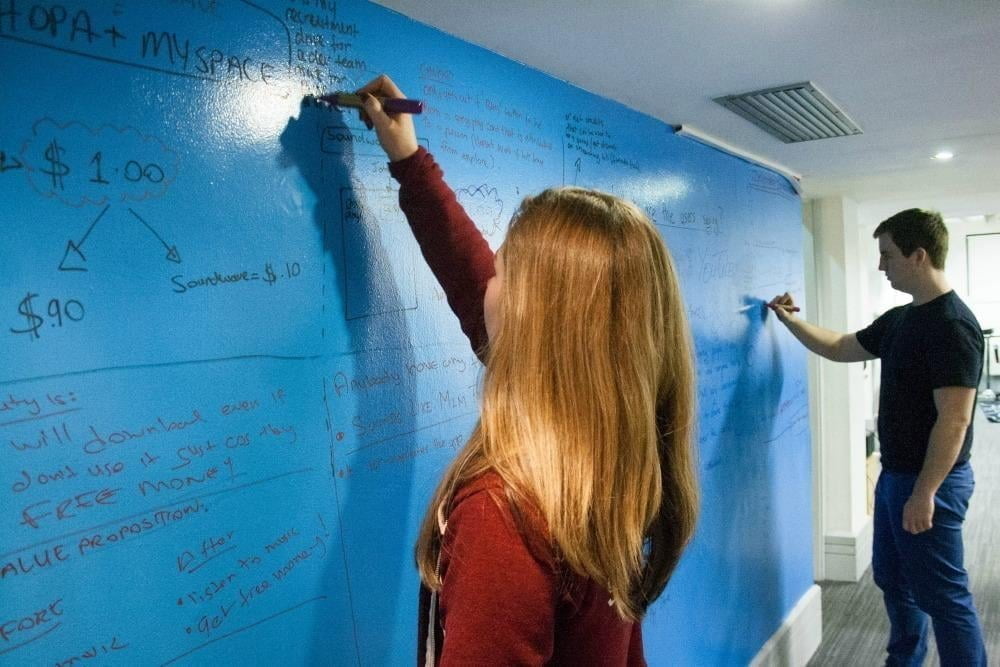
When you think about how to turn a wall into a whiteboard, size limitations are completely shattered. Imagine an entire wall in your office, conference room, or classroom transformed into a sprawling canvas for ideas. Here, multiple people can collaborate simultaneously, whether you’re conducting a SWOT analysis on one corner, sketching product designs in another, or setting quarterly goals and KPIs across the top. There is room for everything and everyone.

A wall-sized whiteboard opens the door for more dynamic and interactive presentations and lessons, offering a solution for those wondering how to turn a wall into a whiteboard. Educators can use the added real estate to display more information simultaneously, aiding in visual learning and allowing for a more holistic approach to teaching. Similarly, business presentations can benefit from a much larger ‘slide space,’ where multiple points or ideas can be displayed collectively, offering a clearer, more comprehensive view of strategies or data analyses.
By eliminating the need for everyone to huddle around a small board or constantly erase valuable information to make room for new ideas, a whiteboard wall allows for a more fluid, interactive, and ultimately productive experience.
4. Ghosting is a Thing of the Past
One of the most common and frustrating issues is “ghosting.” However, when you learn how to turn a wall into a whiteboard using high-quality products, ghosting becomes a thing of the past. Ghosting refers to the lingering marks or smudges that remain on the surface after erasing, giving the whiteboard a dirty and unprofessional appearance. This issue often makes you spend extra time and effort in cleaning, which can be quite annoying, especially in a fast-paced work or educational environment where time is of the essence.
However, when you turn your wall into a whiteboard using high-quality products like Smart Whiteboard Paint or Matte Whiteboard Paint, ghosting becomes a thing of the past. These products are designed with advanced technology that resists ghosting, offering you a crisp, clean surface every time you erase.
Does Dry Erase Come Off Walls?
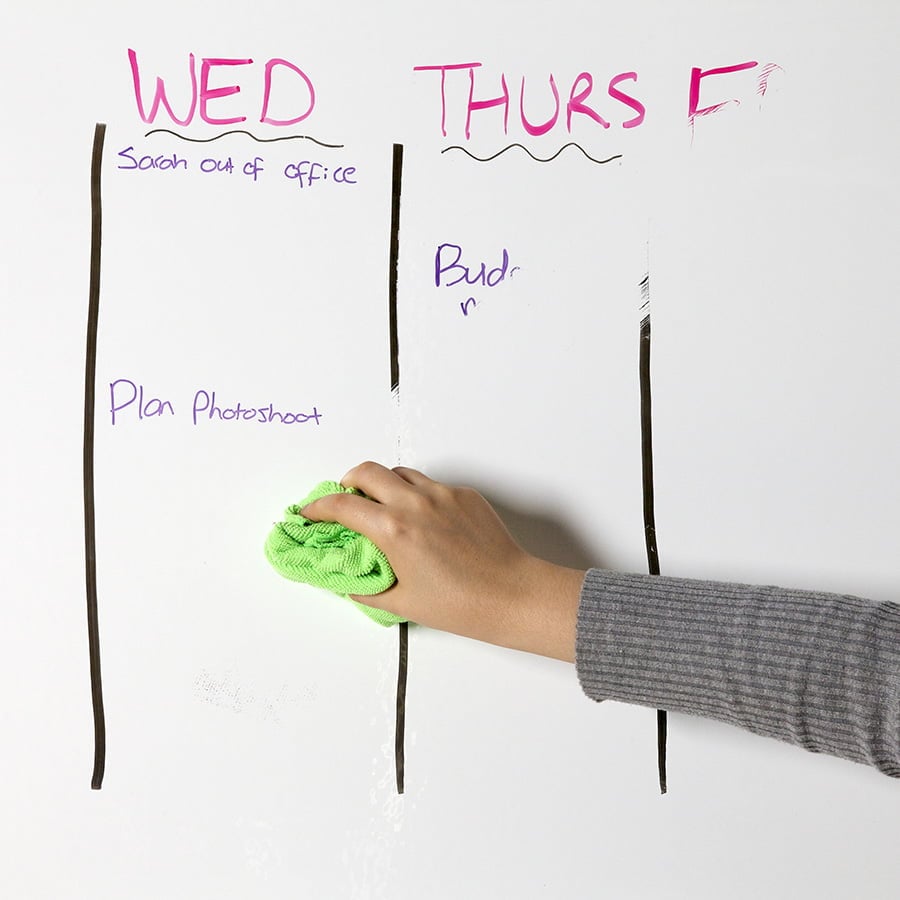
When you use high-quality whiteboard paints like Smart Whiteboard Paint or Matte Whiteboard Paint, erasing is a breeze. No ghosting, no smudging; your wall remains as pristine as ever.
5. Limitless Color Choices
Traditional whiteboards are, as the name suggests, predominantly white. This limitation doesn’t give room for aesthetic creativity or integration with room themes and decors. However, if you are think about how to turn a wall into a whiteboard there are many of color possibilities, allowing you to truly customize your space according to your personal or corporate brand, rather than just a white whiteboard.
Transparent whiteboard paint is a ground breaking product that lets you have the best of both worlds. With transparent paint, your chosen wall color shows through, allowing you to maintain the wall’s original look while adding the functionality of a dry erase surface. This is an excellent option for those who have textured or patterned walls that they don’t want to cover entirely.

How to Turn a Wall into a Whiteboard: Choosing Between Whiteboard Paint and Whiteboard Wallpaper
When planning on how to turn a wall into a whiteboard, one of the first decisions to make is whether to go with whiteboard paint or whiteboard wallpaper. Each has its unique set of advantages and drawbacks, so it’s crucial to make an informed choice.
Whiteboard Paint
Pros:
- Seamless Integration: One of the most significant benefits of using whiteboard paint is that it blends perfectly with your existing wall, offering a seamless writing surface.
- Color Options: With transparent whiteboard paint, you can maintain your wall’s original color or even try a new hue before applying the dry-erase layer.
Cons:
- Drying Time: Whiteboard paint needs to cure for four days, which means you’ll have to wait a bit before you can start using your new writing surface.

Whiteboard Wallpaper
Pros:
- Quick Installation: Whiteboard wallpapers like Smart Whiteboard Wallpaper are usually ready to use 24 hours after application.
- Finish Options: Wallpapers come in various finishes like low sheen or matte, offering you more aesthetic choices and projectability too.
Cons:
- Professional Installation: Installing wallpaper might require professional help, particularly if you’re covering a large area.
How To Turn A Wall Into A Whiteboard with Whiteboard Paint: Step-By-Step Guide
Before turning your wall into a whiteboard, you’ll need to pick up some Matte Whiteboard Paint, Smart Whiteboard Paint, or Clear Whiteboard Paint. Then follow the How To Turn A Wall Into A Whiteboard Guide below.
Step 1: Choose Your Surface and Measure the Area
Firstly, decide which wall or portion of a wall you’d like to transform. Measure the area to determine how much whiteboard paint or wallpaper you’ll need.
Step 2: Prepare the Wall and Area
Preparation is key. Ensure the wall is clean and smooth. Patch any holes and sand the surface if needed. Cover any surfaces not being painted.
Step 3: Mask the Wall
Using masking tape, mask the area you want to paint.
Step 4: Apply Primer
Most high-quality whiteboard paints require a primer to give you that smooth finish, like our Smart White Primer. Apply this as you would standard paint and let it dry before applying the whiteboard paint.
Step 5: Apply Whiteboard Paint or Wallpaper
Once the primer is dry, it’s time to transform your wall into a whiteboard. Follow the specific instructions for your chosen product.
Step 6: Dry and Test
Allow the surface to dry for the recommended time before you start writing or drawing on it.
How To Turn A Wall Into A Whiteboard with Whiteboard Wallpaper: Step by Step Guide
When looking at how to turn a wall into a whiteboard with wallpaper you will want to choose one of the wall coverings from our functional wallpaper range.
Step 1: Preparing the Wall
- Lay down protective plastic on the floor.
- Fill any holes or cracks in the wall.
- Remove old wallpapers and sand down uneven surfaces.
- Apply a primer like Smart White Primer to prep the wall.
Step 2: Measuring and Marking
- Plan for horizontal application.
- Draw a level line 1.22m off the floor as a guide.
Step 3: Cutting the Wallpaper
- Roll out wallpaper on the protected floor.
- Cut it to the desired length.
Step 4: Applying Adhesive
- If needed, dilute the ready-mixed heavy-duty adhesive with 10% water.
- Apply two coats to the wall using a roller.
Step 5: Installing the Wallpaper
- Roll up the cut section, paper side out.
- Align the bottom edge with the 1.22m guide line and roll out horizontally.
- Use a wallpaper spatula to smooth out bubbles and excess adhesive.
Step 6: Butt Jointing for Next Lengths
- Align the next section just beneath or above the first.
- Work the joints together using a wallpaper spatula.
- Add extra adhesive if necessary.
Step 7: Overlap and Double Cut Method
- Overlap the new section by 2-3 cm.
- Cut along the middle of the overlap.
- Remove excess material and smooth with a spatula.
Step 8: Final Touches
- Wipe off excess adhesive with a damp cloth.
- Wait for 24 hours before using the wallpaper.
Step 9: Inspection
- Inspect for bubbles after 30 minutes.
- Use a spatula to smooth out any imperfections.
Maintenance Tips for Your Whiteboard Wall
Once you’ve successfully followed the steps in our How to Turn a Wall into a Whiteboard guide, it’s essential to maintain it properly to ensure its longevity and usability. Here are some tips:
1. Use High-Quality Markers
Always use markers specifically designed for dry erase boards. Low-quality markers can leave permanent stains and compromise the surface.
2. Regular Cleaning
Perform routine cleaning using specialized whiteboard cleaners to remove any residual ink or dust.
3. Avoid Abrasives
Never use abrasive cleaners or scouring pads, as they can scratch and damage the surface.
4. Replace Markers Regularly
Old or dried-up markers can be harder to erase, leading to ghosting over time. Make sure to replace your markers regularly.
Practical Applications of a Whiteboard Wall in Different Sectors
Educational Institutions
If you’ve followed our guide on how to turn a wall into a whiteboard, you can leverage whiteboard walls to create dynamic learning environments. For example, a teacher can use the expansive surface for collaborative projects, fostering collaboration and creativity among students.
Business Settings
From startup brainstorming sessions to corporate strategy meetings, a whiteboard wall can be a game-changer. It provides ample space for laying out complex plans or models, enabling a more interactive and productive discussion.
Creative Studios
Whether you’re an artist, designer, or architect, having an entire wall to doodle, sketch, or plan can significantly benefit your creative process. All you have to do is follow our steps on how to turn a wall into a whiteboard first.
Home Use
If you’re a family considering how to turn a wall into a whiteboard, it can serve multiple purposes—from a space for kids to unleash their creativity to a family planning board.

Unlock the Power of Creativity
Turning a wall into a whiteboard is not just a trendy fad but a functional, practical, and innovative solution to many limitations presented by traditional boards. With various products to choose from and an array of applications across different sectors, there has never been a better time to embrace this transformation. So if you’ve been contemplating how to turn a wall into a whiteboard, there has never been a better time to embrace this transformation.
by mj | Oct 19, 2020 | Business

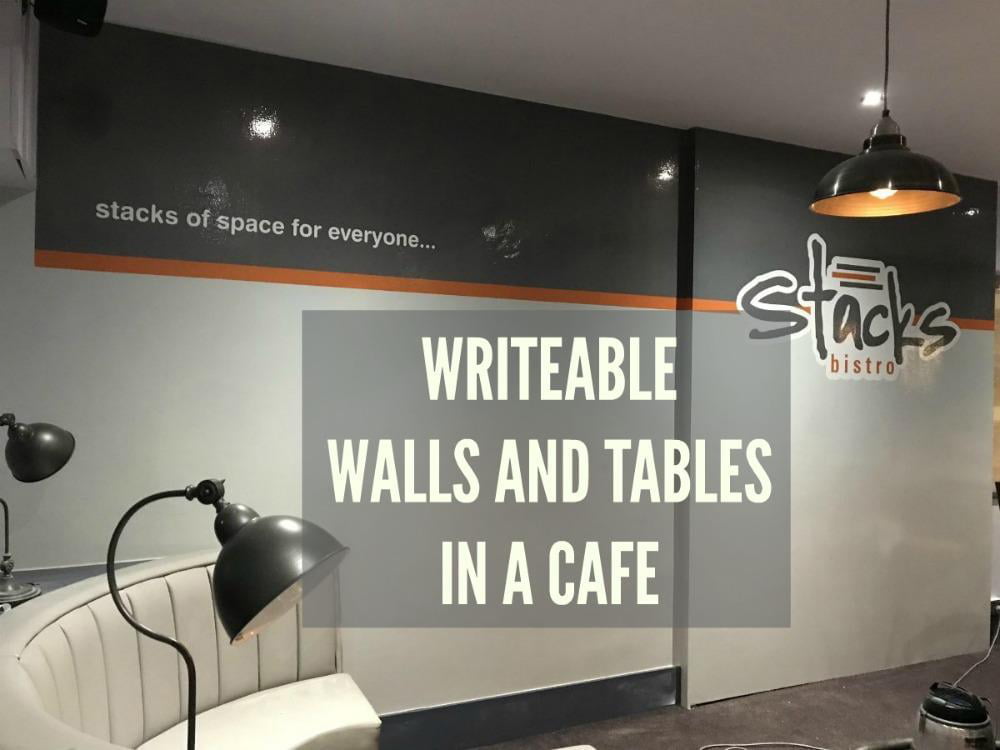
Calling all restaurant and café owners ? If you thought our write-on wipe-off paints and wallpapers were just for offices, think again.
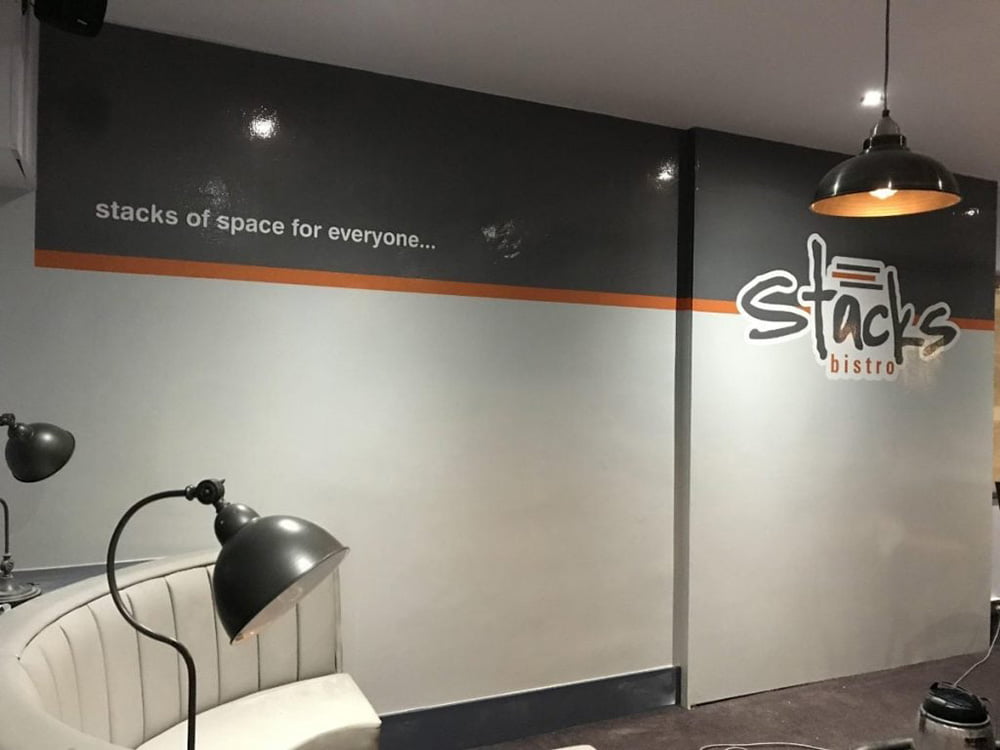
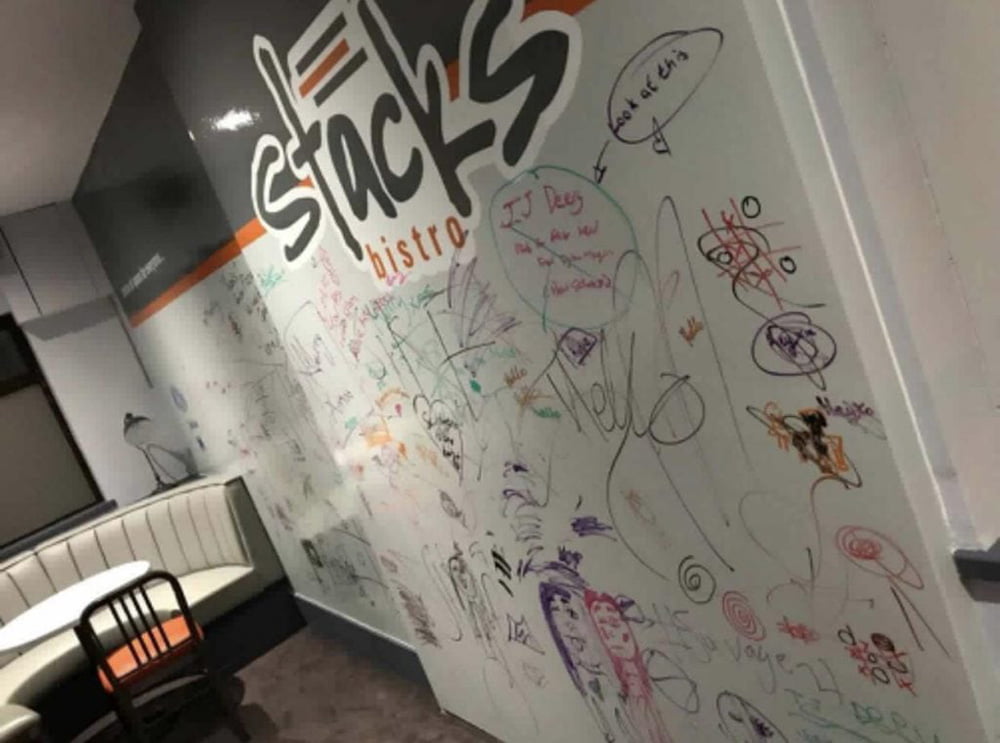
Congrats to James Deery and all the team in Stacks on creating such an innovative and collaborative space through writeable walls and tables.
We LOVE what Darren Toner of Smarter Surfaces Northern Ireland has done to transform the interior of Stacks Bistro when they recently moved offices.
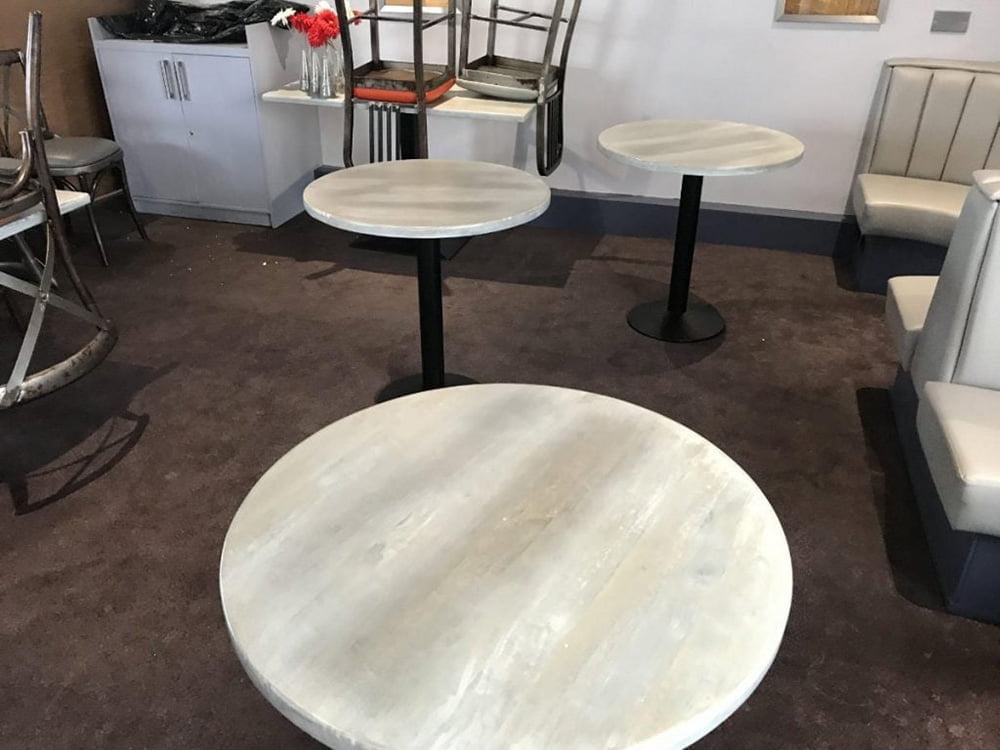
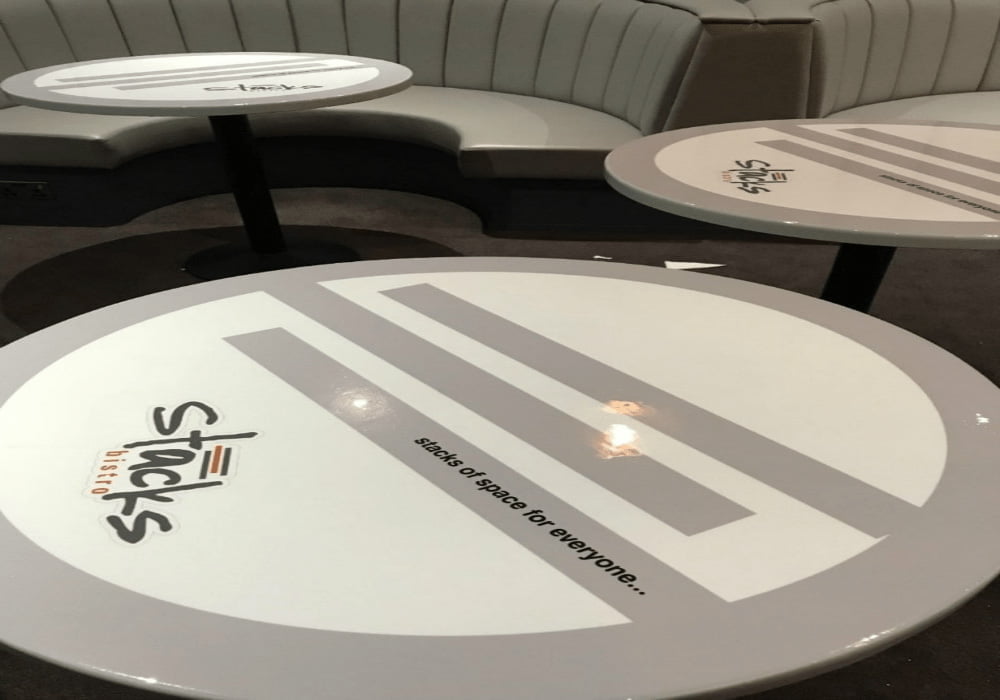
Writeable Tables
The tables looked like this before they were “smartified”:
Now they look like this:

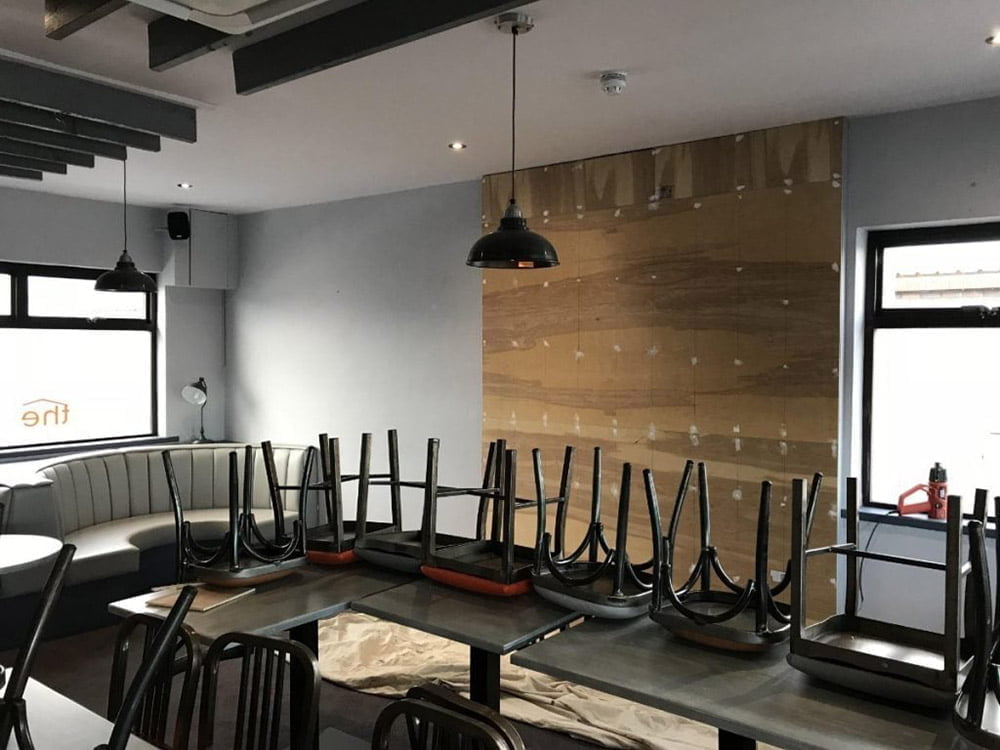
Writeable Walls
The walls looked like this before they were “smartified”:
Now they look like this
Opening Night
So the all important question ? what did customers think of the new writeable wall in Stacks ? See for yourselves :

Make Your Tables and Walls Writeable in 4 Easy Steps
Just follow these steps to get a writeable surface for your tables and walls. Want to customise it with your logo too ? No problem. Read on.
1. Apply Base Paint
Apply base paint in the colour of your choice (or to match your logo).
2. Stick Your Logo on Top of the Base Paint
Print your logo on a sticker (any high street printer can do this for you). When the base colour paint is dry, remove the backing from your logo on a sticker, affix to the table in your preferred spot.
3. Apply Smart Clear Primer
This has two benefits. A coat of primer will seal the bottom surface and it will act as a base for the final whiteboard paint that goes on top. Do not skip this step as it is very important for erasibility.
4. Apply Smart Wall Paint Clear
Mix this two part paint. Follow the instructions carefully.
Allow sufficient time for your whiteboard paint to not only dry, but to cure. Then you are ready to go !
Pop along to the new Stacks which is open for breakfast, lunch and dinner.
by mj | Oct 19, 2020 | Business

Loud Mouth Media is a multi-award winning digital advertising agency with offices located in Belfast, Dublin and Glasgow. Since launching in 2011, they have experienced remarkable growth to become a Premier level Google Partner and one of the top three SEM agencies in the UK.
Specialising in Pay Per Click (PPC) advertising, they were awarded Best Small PPC Agency in the UK at the UK Search Awards 2017.
Their clients include the Belfast Telegraph newspaper, Yankee candle company, Avoca, Tayto, Ulster University, Ulster Rugby and the Titanic Museum.
The Challenge for Digital Agencies
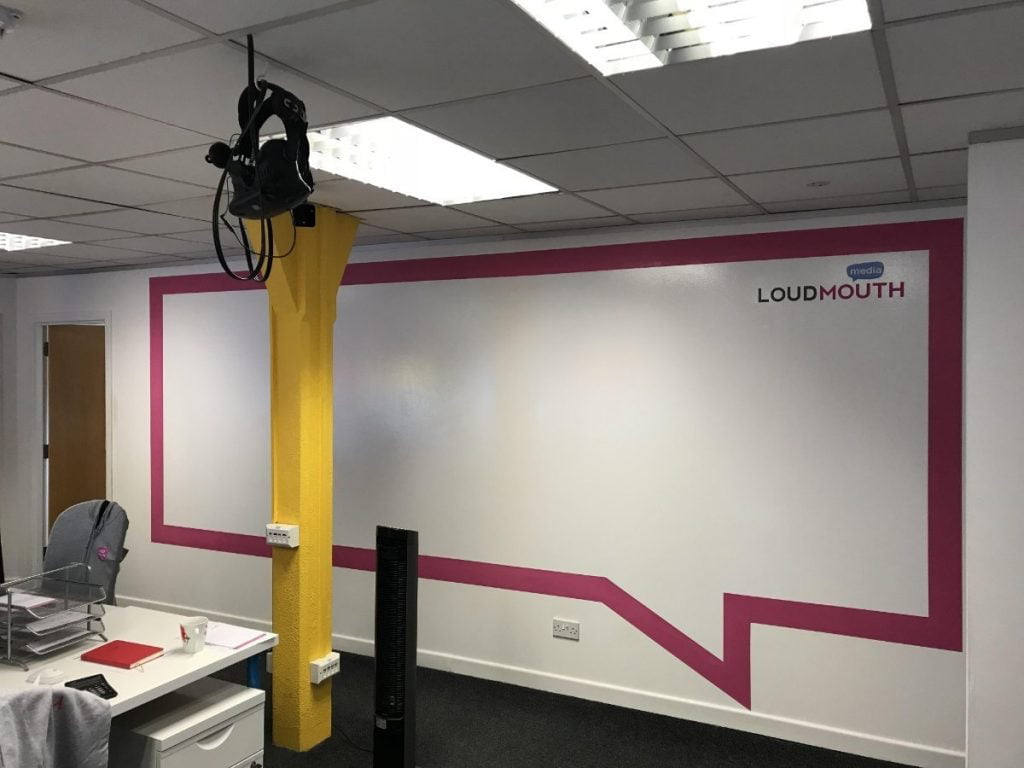
As an advertising agency, Loud Mouth were of course keen to incorporate their branding into their whiteboard walls. Their job is to promote other people’s brands so they need to demonstrate branding at all touch points. Where better than on the wall everyone is looking at ?
Loud Mouth also didn’t want a traditional square whiteboard, they wanted a speech bubble shape whiteboard. This is modern and creative, just like them.
The Solution
No problem ! With our whiteboard paint, you can create a dry erase surface of any shape or any colour. There are no limits.
Check out the results :

(In case you are wondering where Loud Mouth got their name from, they say they are named fondly after the Managing Directors Mother-In-Law!)
Whiteboard walls are perfect for digital agencies who interact with both clients and staff. Use the entire wall for brainstorming and design. Project onto to show campaigns and idea. Work with clients and staff to fine tune details. Get everyone on their feet and let the creative juices flow when working on walls.
All Digital Agencies Can Have Branded Walls
If you want to create a similar look for the whiteboard surface in your business, just follow these steps :
Apply Smart Primer to prime the wall
When the primer is dry, Apply Smart Wall Paint whiteboard paint
When Smart Wall Paint is dry, remove the backing from your logo on a sticker affix to the wall in your preferred spot. (Note any high street printer can print your logo on a sticker.)
Use border tape to mark out the speech bubble border.
Paint the border (within the masking tape) in the colour of your choice.
See how your customers react to your new whiteboard wall with your logo on it. Enjoy the extra engagement and productivity you, your team and your clients will benefit from with such a large working space.
by mj | Oct 19, 2020 | Business, Case Studies, Education

At Smarter Surfaces we believe that the design of your office can really impact the way you work.
But why just take our word for it? Look at our customers and see for yourself.
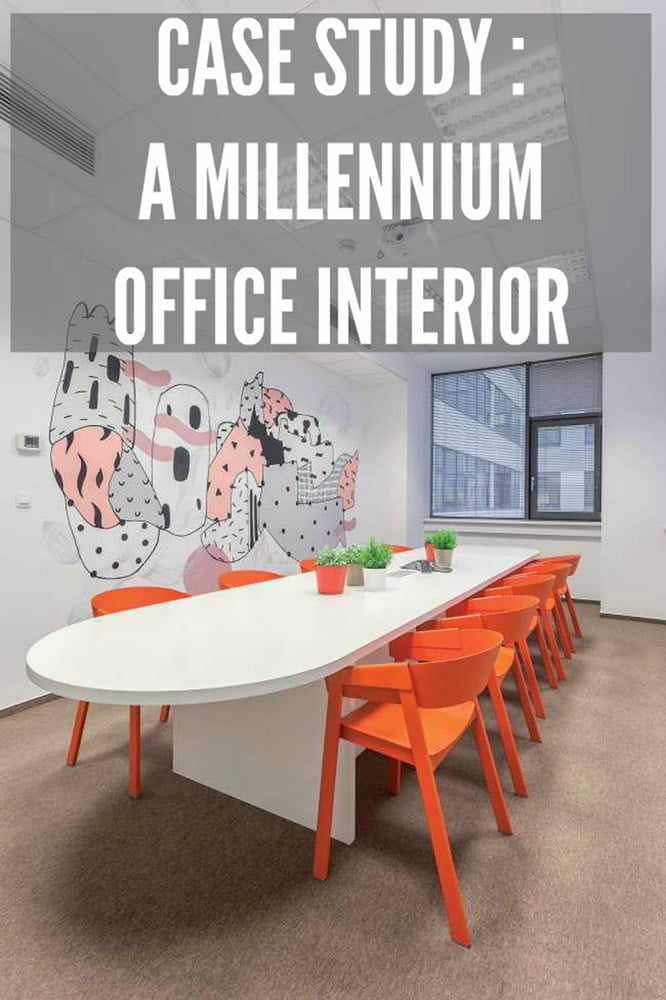
This is Millennium, an IT company in Bratislava who deliver and administer portal and CRM solutions. Prepare to be blown away. Transform as many walls as you can into dry erase surfaces, add one very talented artist, check out the results.
With over 200 happy clients, Millennium have been in business for 17 years. Some of their well known customers include Heineken, the Slovak Agriculture University in Nitra, and some government departments including .The Ministry of Health of the Czech Republic and the Ministry of Economy of Slovak Republic.

Design Considerations for a Large Office Space
Millennium chose our award-wining whiteboard paint, Smart Wall Paint, to cover an area of 560 square metres throughout their office building. They put a lot more thought into their office design than simply painting walls. Their interior, although very elegant, was just lacking something to make it special and stand out.
There were some other considerations. How do you facilitate intimacy when designing the interior of very large office spaces ? How do you maximise efficiency of using each square metre ? Is there a danger in trading efficiency for intimacy ?
They came up with a solution.
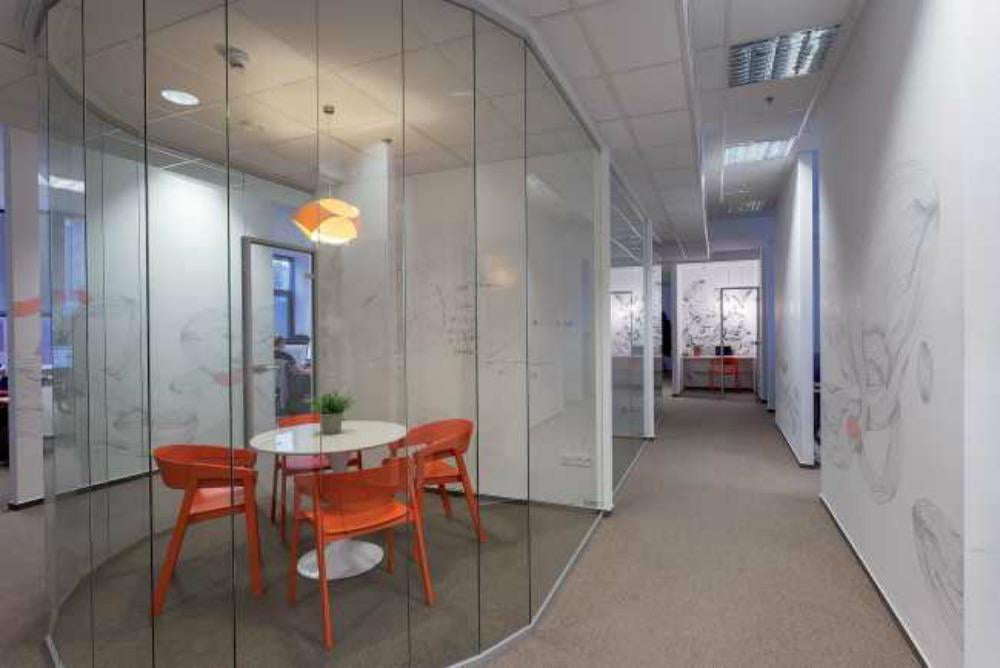
They decided they would apply whiteboard paint on the walls throughout their meeting areas and public spaces. Next, they approached Juraj Hibinsky who designed the themes on the walls. Check these out for inspiration for your office.
Workspaces for Collaboration
With walls converted into productive surfaces for writing (thank-you Juraj !), the previously unloved and unused walls transformed entire spaces into high demand areas for group brainstorming and design exercises as well as traditional meetings.
The absence of doors created the right corporate and working spirit, and gave added advantages of easy communication and interaction.
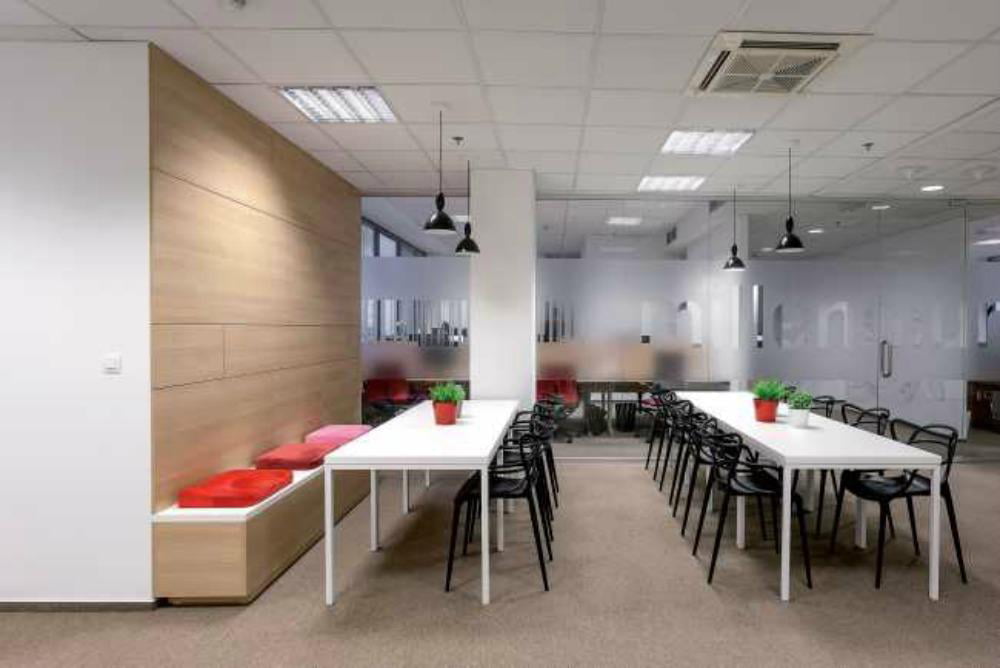
Millennium’s work environment is now a perfect space for work councils, meetings and huddles. With so much open and collaborative space available, employees also have a variety of seating choices available to them.
Workspaces for Individuals
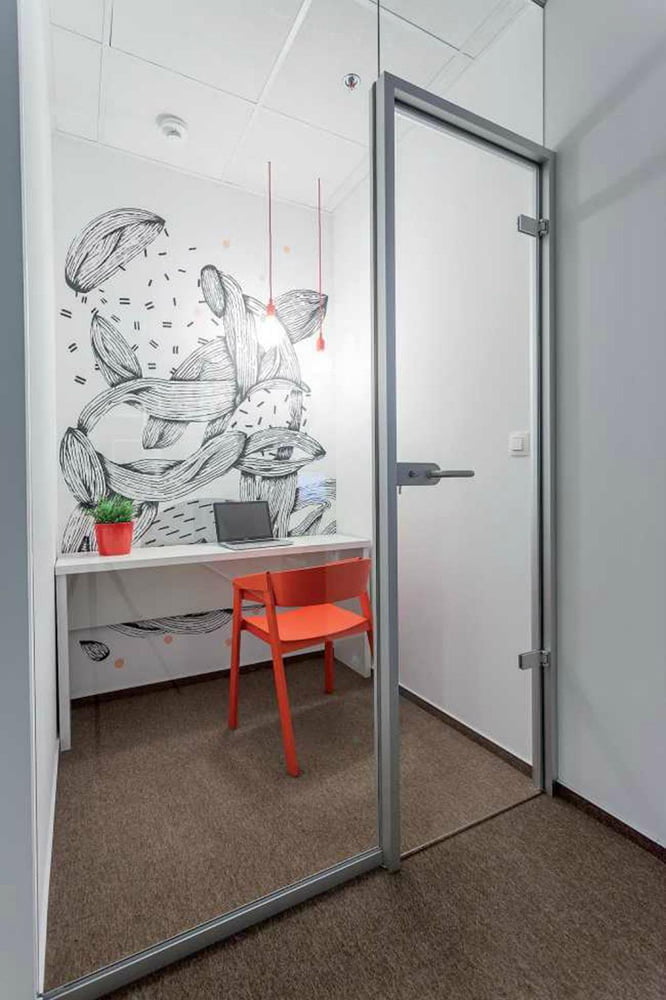
Want to work alone ? No problem. Millennium have also created ideal locations for independent work to prevent distractions and to facilite peace and quiet.
‘Telephone booths’ have desks that face away from the rest of the office to provide both privacy and a workplace background.
The kitchenette and dining area may be separate from the office, but this hasn’t stopped then from being a popular working or meeting location used throughout the day by staff.
The dining room is also used frequently for corporate events. Even the utility room can be used as a collaborative area.
Millennium are the perfect example of how easy it is to increase worker engagement just by simply changing how your office looks with one innovative product like whiteboard paint
It can really make a difference.
How can you enliven your work space ?